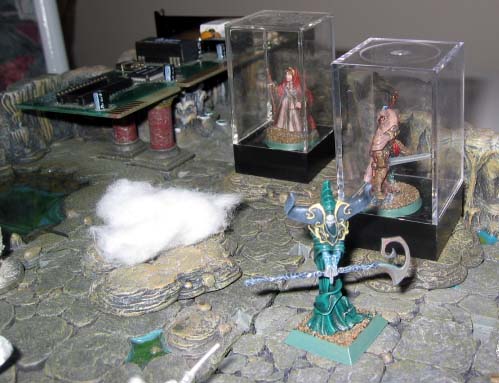
Before playing the game, we gather and have a meal together. The gathering of different flavors and dishes is a real treat for the eyes and chops. Beef Bourguignon, mashed potatoes, vegetable soup, home-made burritos, double-chocolate almond bark, cinnamon and banana bread puddings - this is a food fest.

After this succession of gourmet delights, we are finishing the players' characters (PCs) generation. The players choose feats, spells, equipment and roll the base wealth of their characters. Skill total bonuses are calculated. The end results:
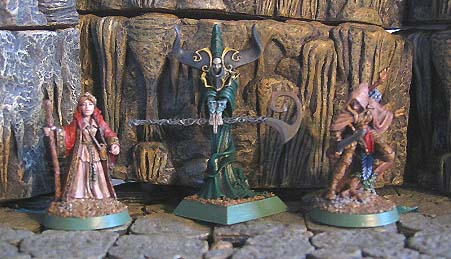
- Beket Per Aau-Nu, female human monk worshipping the Old Man, acolyte of the Watcher of the Skies. She knows Helmut Itlestein for being a regular at the Observatory of the Watcher of the Skies in the Temple District. She originally comes from Kem, and has some Celestial Ancestry.
Monk level 1.
Feats: Celestial Ancestry, Lightning Reflexes, Iron Will, Improved Unarmed Strike.
- Heinrietta "Henny" Nagel, female human sorcerer worshipping the Elder Gods, admirer of the Knights of the Golden Cross. She currently lives in Old Town and wants to make it on her own, without the financial support of her House.
Sorcerer level 1.
Feats: Noble Birth (House Nagel), Heighten Spell, Exotic Weapon Proficiency (Firearms).
- Simone Ahrenameer, female shoal elf worshipping Tardeshou, Goddess of Truth, and her brother Navashtrom, God of Strength and Harmony. Simone is a servant to House Sadar, to the great disappointment of her parents living on Emerald Hill. She secretly intends to spy on the House and wants to find out what its schemes and criminal dealings are to better avert them. She does not have access to the most secure parts of the Sadar Mansion yet.
Rogue level 1.
Feats: Weapon Finesse (Short sword), Investigator.
Once the characters are generated, we immediately start playing the game.
Session 1 - Escape from Zalathar's Lair
1st of Rain
Some time ago, Henny and Simone both purchased a membership to the Delver's Guild. They decided to collaborate with a monk, Beket, to start their careers as professional delvers. For their first delve, they decided to hunt for ratmen, since the Church of Lothian is offering bounties on rat tails brought back to the surface.
None of them really remembers what happened. They were exploring some parts of the sewers below the city and had some success during their hunt, until they were ambushed by unknown adversaries. All they truly remember is a bright flash of light. The rest is a succession of images and impressions that could have been more dreams than memories. Their minds drift for a while...
Beket feels like she's falling. She doesn't really feel any pain, but she soon comes in contact with something hard. The ground, probably. She hears a bubbling sound beside her and some sort of rattle in the distance. She opens her eyes and realizes she is soaked in some sort of oily, thick amiotic fluid. She turns and sees her partners floating in glass jars, with breathing masks and tubes plugged to their skins. It looks like they all have been taken prisoners by people eager to practice on them.

Beket doesn't waste any time. She helps her friends to break free from their strange prisons. All pods were they were kept prisoners are wired to a machine nearby that seems to be breaking down, judging by the puffs of smoke and rattling sounds coming out of it.
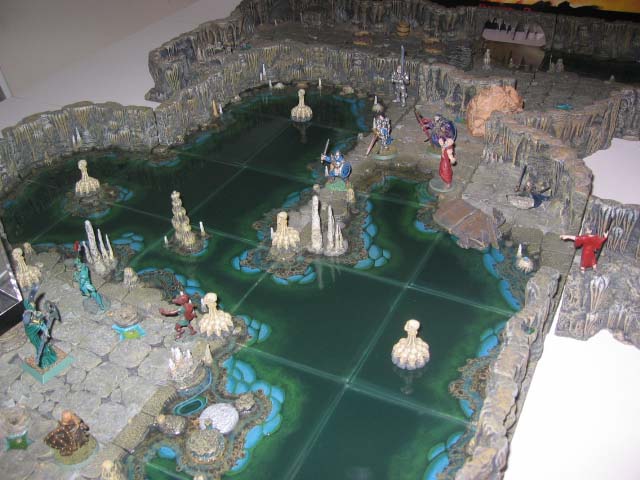
The adventurers assess their situation. They are now standing on an island, surrounded by stone representations of people dressed with genuine clothing and equipment. It looks like whoever decorated this place has a taste for creepy museums. They notice that they were all dressed up and equipped while floating in the amniotic fluids. This seems strange, since one would expect to be completely undressed while being subject to whatever experiments the people working here subjected them to.
Beket is the first to stop thinking and start acting. She crosses the stream of water surrounding their island of fortune, but as soon as she steps in the water, she is attacked by a predator swimming under the surface! Her companions help her out, shooting at the creature each time one part or the other of the creature's bloated body is exposed to the air in their struggle. After almost drowning from it, Beket manages to break free from the creatures clutches. Soon, it is too badly wounded to keep on fighting. Whatever this was, the adventurers are now warned: wherever they are, the seemingly peaceful cave still harbours unseens threats they will have to avoid if they want to make it out alive.

Each of the adventurers then proceeds with a methodical search of the natural cave and its statues' clothing. They find a few gold imperials, potions and decent weapons. It's as if the sculpted men and women around were "dressed up" for the occasion and provided with all the items they would normally carry, were they truly alive.
The group discovers a strange crystal that seems to have fused with the surrounding rocks. Just as they investigate further, they see the crystal suddenly morph into the rock, revealing an opening before them!
Someone on the other side steps in the cave the adventurers stand in and bumpts into Beket, much to her surprise: this is a bugbear who seems more astonished than she is. He runs away screaming at the top of his lungs - "They escaped! They ESCAPED!"
The adventurers run after the bugbear and meet with his companion, an elf who is grabbing some sheets of paper in haste on a desk nearby and summoning a flame to quite visibly burn them before anyone has a chance to examine their contents. Beket, Henny and Simone spring into action. The bugbear knocks Beket unconscious, but her attacks give the opening Henny and Simone needed to extinguish the elf's flame and defeat him before he has the time to do anything! The bugbear is tougher, but both adventurers manage get rid of him. When the creature finally succumbs to its wounds, it drops a healing potion. Henny uses it on poor Beket who regains her consciousness.
The group searches the elf and bugbear's living quarters. They discover a stack of notes, a spellbook, and enough supplies for them to survive in this cavern for weeks if need be, but they'd rather not have to. The group decides to rest for a while.
2nd of Rain
As soon as the adventurers wake up, they skim through the notes and spellbook of the elf. It soon becomes apparent to Henny that there is a way out. Not far from the elf's desk, there is a ritual circle carved in the stone. Using some of the elf's spell components, Henny manages to activate the circle, effectively a portal to another location. Wherever this portal leads to, this is the key to the adventurers' freedom, and they know it.
They all step in the circle and Henny performs the activation ritual.
Their surroundings fade... and the adventurers now stand in a small circular chamber. The walls here are more regular than those of the caves they come from. In front of them, they see a blue steel door. They suddenly realize where they must be: somewhere under Ptolus, in some area of Ghul's Labyrinth.
They know blue steel doors cannot be forced open. They have no lock or any opening mechanism, for that matter. They have to find the command word that will open this door. They discuss a moment, try a few words, Simone attempts some basic expressions in some infernal dialect. She finally gives up, and shouts an "OPEN!" in frustration. The door then slides open, to the adventurers' amazement.
Beyond the door, the adventurers see a vast room that was used as living quarters for the people operating the labs below. But these quarters have been attacked: the place is completely trashed, and graffitis cover all the walls with depictions each more obscene than the others. Among the depictions, the adventurers notice a black hand's print has been placed in several key positions. Could the Cult of the Ebon Hand have something to do with the assault on this section of Ghul's labyrinth?
 Laboratories Living Quarters
1- Teleportation Circle
2- Trashed Laboratory/Living Quarter
3- Group of Kobolds around the fire
3a- Kobold wastes
3b- Kobold pet chained to the wall (wardog)
4- Kobold Chief's quarters (previously storage space)
5- Arcane locked bedroom
6- Not-so-friendly kobold pet in pit (Dire wolf)
7- Trashed laboratory
8- Storage Space
9- Lizardman sentinel
10- Hamrick and the Treasure room behind
12- Sewers
13- Sewer shaft up to the main sewer system
As they step outside the room, trying their best to hide in the shadows, Simone and Henny notice the place is inhabited by a clan of kobolds having dinner around a fire nearby. With Beket, they sneak past them and reach another vandalized part of the complex. There, a lizardman guards an opening to ... the sewers, at last!
The adventurers immobilize the lizardman and question him. It soon seems obvious this mercenary knows something he's not telling. Simone manages to make him talk. The lizardman knows the kobolds have a treasure room somewhere. They use him to guide them through the corridors, but soon a trap is activated, and the lizardman takes several poisoned arrows in the chest. His body shaken by violent convulsions, he dies almost instantly.
Ahead stands the treasure room. A long time ago, this was a guards' room, back when the Ghulwar was still tearing the land apart. The door to the treasure room stands atop a flight of stairs. Before the door, a halfling stands guard and bids them a falsely warm welcome.
The cocky halfling, Hamrick, explains he's been hired by the kobolds. He is very bored and annoyed at "the obnoxious little midgets", however. If the adventurers want to, Hamrick could join them and together they could take the treasure back to the surface. The group considers Hamrick's proposition for a moment, and convince him to have a look at the treasure before taking any decision. While opening the chest and showing its contents to the adventurers, it seems obvious Hamrick has been concealing some of the items to the others' sight and hiding them under his cloak.
Beket seizes the halfling by the ankles and shakes him vigorously: indeed, several items of value crash to the floor. With Hamrick kicking and screaming, they leave the area and use the halfling to guide them through the sewers and back to the surface. Once there, they just release the halfling, advising him to keep out of trouble for the next while. Of course, the halfling doesn't seem to care, preferring to curse at them as they walk down the streets of the Guildsman District.
Whatever the case, Beket, Henny and Simone have more pressing matters to care about. Who were the people operating the labs, and for what purpose? Why did the Ebon Hand, if it had anything to do with it, decide to attack these laboratories? What about their original ratmen's hunt? The lizardman also talked to them about the kobolds who, he said, were originally fleeing the orcs from the Halls of Cordaris. What is really going on in this place? All of these questions, they think, would receive some answers soon enough...
XP Breakdown
The PCs are all Level 1.
Encounter Levels (EL) may be modified from theory to reflect the specific circumstances in which the encounter occured.
- Defeating the creature in the Lake (Grick) - EL 3
- Facing Zalathar and his bugbear bodyguard - EL 2
- Activating the Teleportation Circle - EL 1
- Avoiding the Kobolds - EL 1
- Escaping the Area up to the Guildmans District - EL1
- Gaining access to the Treasure Room while not murdering Hamrick - EL1
Total XP earned: 2,700. XP per PC: 900.


